Tables
I had just moved into a new place and needed some living room furniture. I planned a set of three matching items – an entry table, a coffee table, and a set of shelves. The tables were simpler so I started with those. I staggered the steps, building one part of the entry table first and then afterwards doing the same for the coffee table. Because the two were so similar, I was often able to immediately apply lessons learned from one to the other.
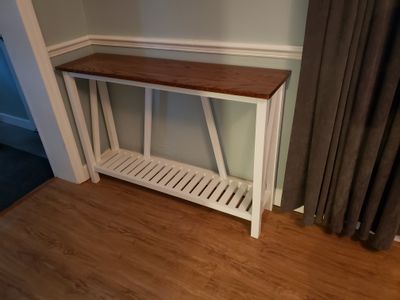
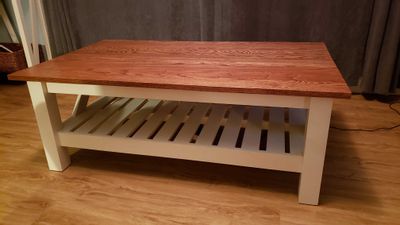
I spent quite a while searching around for different potential designs online and ended up settling on something like this A-Frame Table for the entry table. The same basic design squashed down shorter and wider would serve for the coffee table. After measuring the spots that I planned to put them and checking the sizes of comparable items, I settled on finished sizes of 48″ long × 12 1⁄2″ wide × 31 1⁄2″ tall for the entry table and 47″ long × 28″ wide × 17 1⁄2″ tall for the coffee table.
I settled on a two-tone design with stained oak tabletops and white painted frames made of poplar. I had recently purchased a pocket-hole jig and intended to use that for most of my joinery.
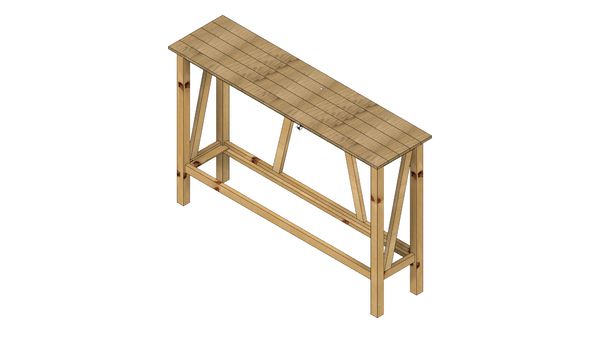
After sketching some dimensions by hand I decided to take a shot at modeling it in a CAD program on the computer. /r/woodworking recommended either Autodesk Fusion 360 or SketchUp and I settled on Fusion 360. There was a bit of a learning curve there, but after watching a YouTube tutorial and figuring out a few basic techniques I was able to make progress fairly quickly. I appreciate being able to declare variables and have the model adapt immediately when you change the values. However, I still prefer the simpler pencil and paper approach – it’s much faster and the CAD model didn’t give me any measurements that I hadn’t already calculated by hand.
Entry Table Frame
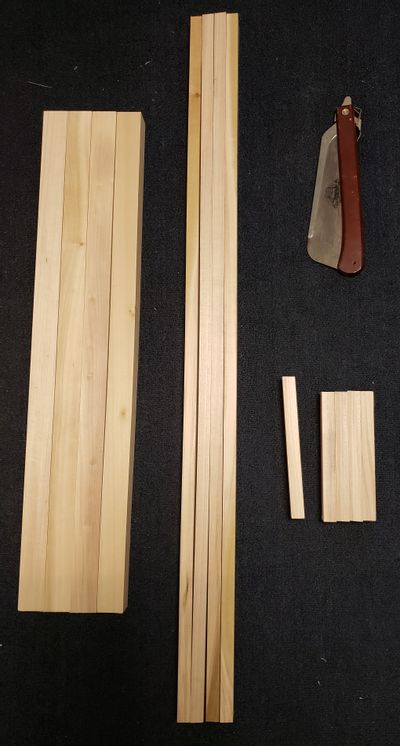
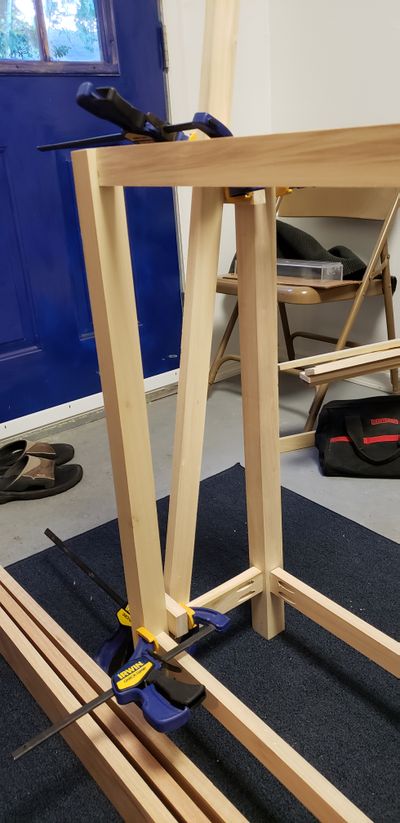
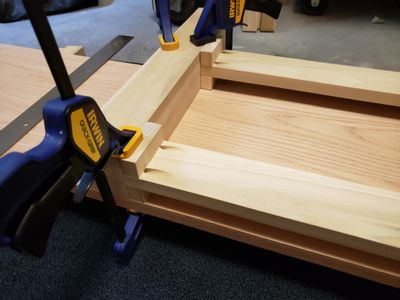
Now that the designs were finished, I threw together a rough cut list and went to buy a bunch of lumber. The entry table started with 2×2 legs and 2×1 for the rest of the frame. First I cut all of the frame boards to length and drilled pocket holes into both ends of each of the main horizontal connectors. I clamped them into position and checked to make sure things were square before driving in the screws to join them to the legs. Once it was all assembled, I glued some plugs into the pocket holes, and trimmed them flush.
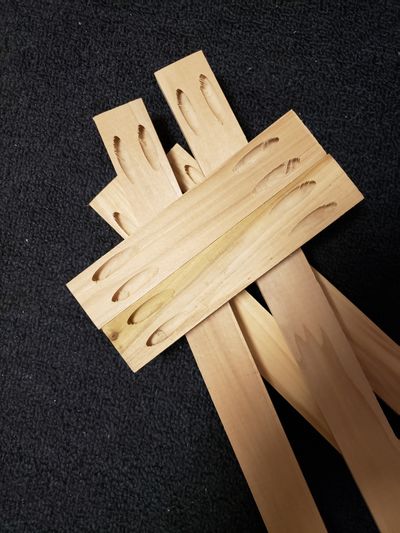
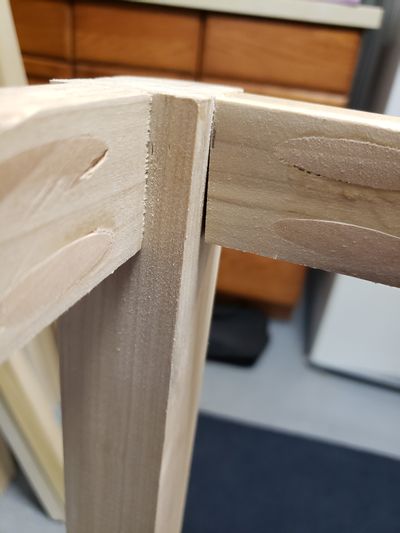
I ran into a few small issues with the process. Measuring and cutting these boards individually by hand resulted in some small inconsistencies which I was able to mostly even out with some sanding. Also, because the horizontal boards were narrower than the legs, I didn’t securely clamp them to the legs while screwing them together which resulted in a small amount of movement when the screw first bit into the second board. Any small gaps were easy enough to fill in with putty which worked fine since I was going to be painting the base anyways. The plugs were harder than the poplar and my flush cut saw struggled to cut them off without marring the board underneath. I ended up just sanding most of them flush with an orbital sander instead.
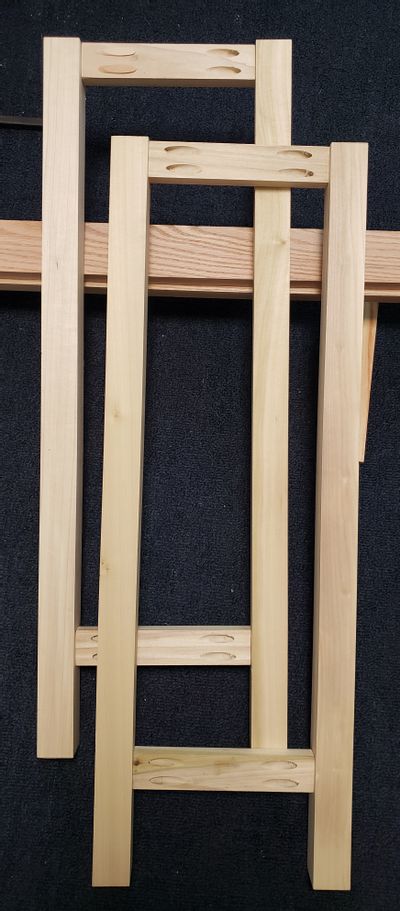
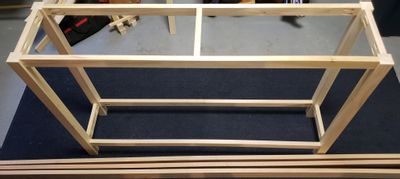
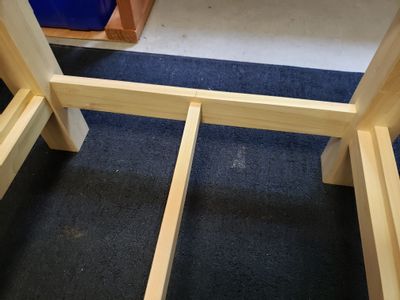
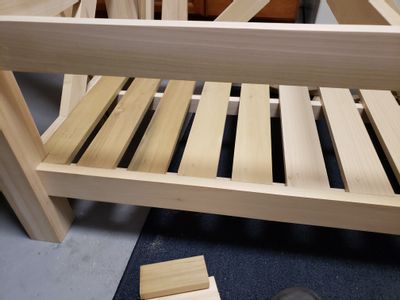
With the basic structure in place, I had to add the bottom shelf and the diagonal cross braces. I glued and screwed a pair of supports for the slats to the bottom of the frame (in hindsight, the screws were completely unnecessary). The supports were attached 1⁄2″ below the top of the frame so that the slats would be flush. I pre-measured and marked the spacing for the slats and then glued and clamped them in place 3 at a time.
I picked a relatively steep angle for the diagonal supports so that they would fit in the space on the sides of the frame and cut 4 boards to size. While I had been reasonably successful in cutting the rest of the frame by hand, I wasn’t satisfied with the accuracy of my diagonal cuts. I ended up buying a miter saw and re-cutting new diagonal boards with that. I attached the back diagonal supports with pocket hole screws, but due to some crowding on the ends of the much shorter side boards just glued those in place. The frame was plenty rigid without them and the diagonal boards were primarily decorative so I didn’t need a lot of strength from those joints.

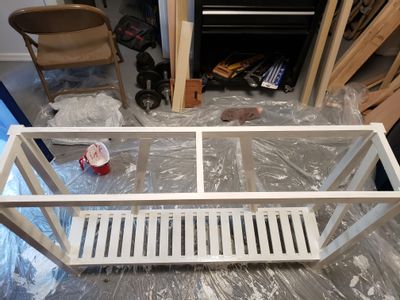
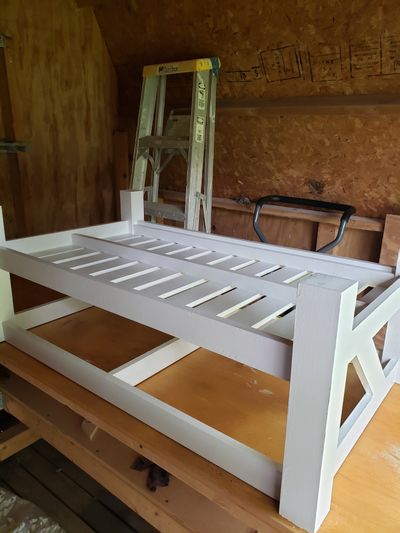
After some final sanding, I primed it with an oil-based primer and then gave it a couple of coats with a interior gloss enamel white paint. Painting a piece also affords quite a bit of tolerance for small errors. In addition to hiding the pocket holes themselves, it also meant that any little gaps or whatever could just be filled in with putty and would be invisible once painted. I was quite pleased with how it came out looking, and the enamel paint gave it quite a durable finish. However, I had quite a few lessons learned there as well:
- Primer dries super fast (but if there are some drips, you can just kinda sand them off after its dry and that’s fine).
- Don’t paint indoors unless you want to poison yourself with paint fumes. Don’t paint outdoors if you think there’s chance of rain soon (and in the summer in FL, that’s nearly every day). Guess I should really just have a well ventilated garage or shop space.
- If you forget to wear your old “painting clothes” to paint in, don’t worry about it, whatever you’re currently wearing are also “painting clothes” now.
- If you think you might have brushed your hair against wet paint but aren’t sure, try touching it. It won’t help you figure out whether or not you got any paint in your hair before, but you’ll definitely have paint in your hair now and won’t have to wonder anymore.
- Expect to leave painty footprints anywhere you go during or after painting.
- Painting 20 individual slats is kind of a pain in the ass.
- It can be hard to spot drips on the underside of things before they dry. The whole frame had to be painted first right side up and then again upside down in order to be able to access all of the surfaces.
Entry Table Top
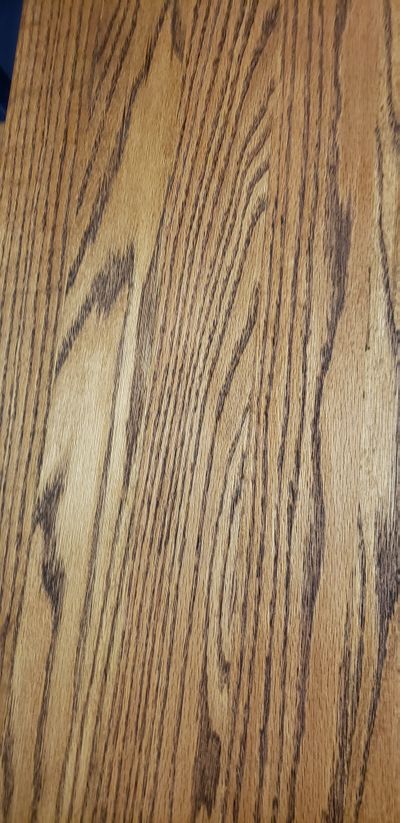
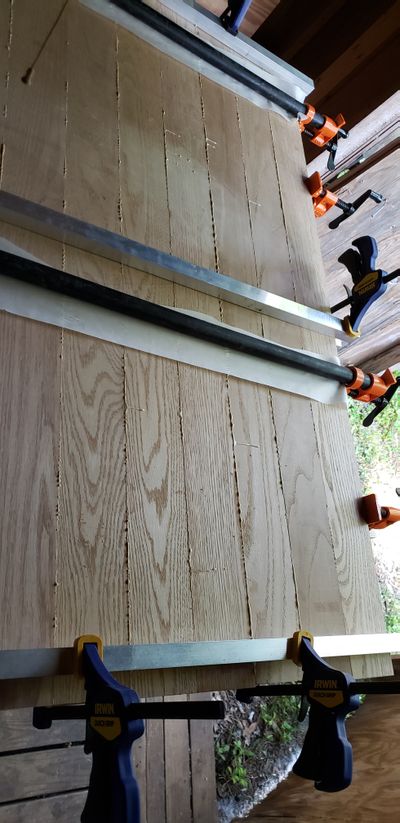
I cut the three 8′ oak boards in half and lined five of the resulting halves up side by side to make the tabletop. I didn’t have any tools to properly joint the boards so I just tried to arrange them such that any side-to-side curvature was evenly matched with the adjacent board. For the few boards that didn’t quite match up I sanded any high points that remained in order to close up the gaps. A plane probably would have been a better tool for the job, but the sandpaper did well enough, though I noticed a tendency to slightly round the corners. Once I had them all in place, I glued them up, clamped on some cauls to hold the ends flat, and squeezed them all together with pipe clamps. (This was my first time using pipe clamps and wow – they’re serious business. Those can apply a whole lot of force.)
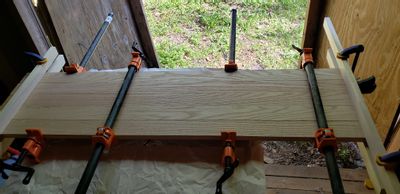
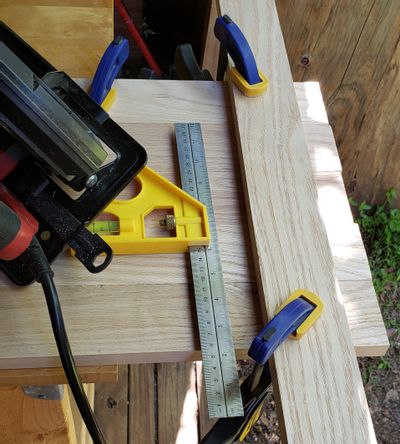
It turns out you can’t actually get two 4′ boards out of an 8′ one – you lose a little length to the thickness of the saw blade, and not every 8′ board is exactly 8′ long. Thankfully, the original design had a full inch of overhang on either end so I had plenty of buffer to absorb the ~1⁄8″ shortfall there. On top of that, the ends weren’t quite perfectly aligned after the glue up. I clamped a board at a right angle near the end of the tabletop and used it as a guide to trim the ends flush with a circular saw. Even with the fence in place, you still need to be pretty careful that the saw doesn’t tilt or drift at all when you’re cutting.
With the top at its final dimensions, the next step was to sand it (a lot). I let my random orbital sander do most of the work and sanded with 60, 120 and finally 220 grit discs. Feeling how smooth the boards were after the finishing with the fine grit paper was incredibly satisfying. I did a quick final sanding pass in the direction of the grain manually with a sanding block and was then ready to apply the finish.
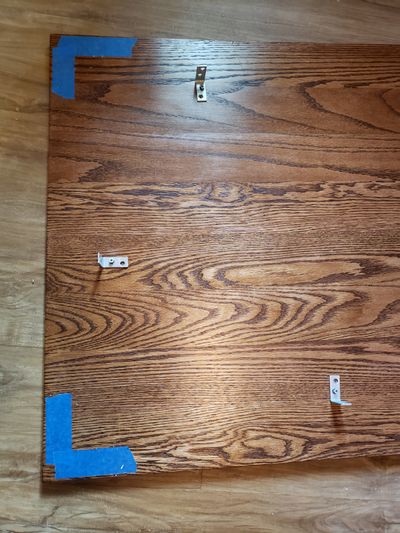
If the boards were at all uneven, glue squeeze-out will hide along those borders and after sanding may not be obvious visible. However, once you apply a coat of stain, they become immediately apparent since it doesn’t absorb the color the same way wood grain will. I had missed a few small spots, but luckily they were all on one side, so I just decided to make that the bottom side. Once the stain was dried, I gave both sides two coats of polyurethane. The instructions on the polyurethane called for sanding between coats. I ended up sanding away a small amount of the stain underneath leaving some of the ridges in the wood slightly lighter-colored – I guess you just have to sand really lightly after the first coat is applied. Additionally there were a few small drips that formed under the edges after I left it to dry. Luckily, most of those issues happened to affect the side that I had already decided would be the bottom so ¯\_(ツ)_/¯.
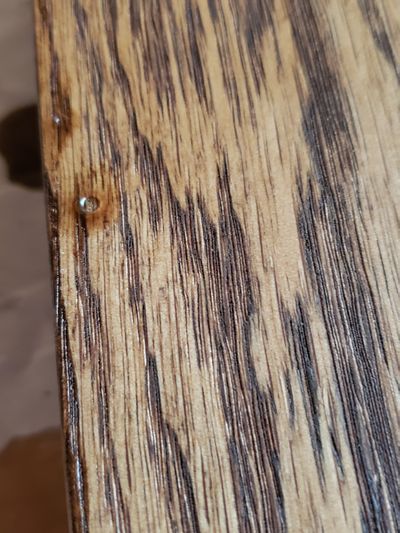
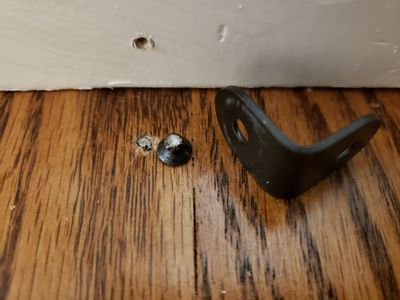
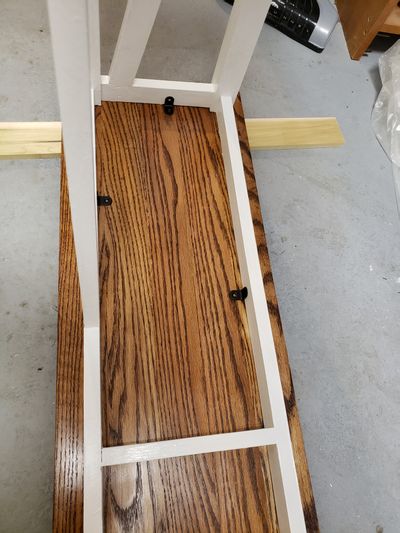
All that was left now was to center the frame underneath the top and affix them to each other with some small metal brackets and screws. While you can low-ball the drill bit size when piloting holes for screws in softwood, that doesn’t work too well in hardwood. I had to re-drill them with a larger bit after twisting the head right off one screw trying to drive it into the oak. Once the assembly was complete, I stuck some felt feet on the bottom of the legs and was done.
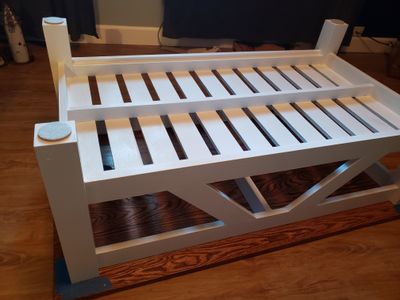
Coffee Table Frame
I used the same basic design as the entry table, but shorter and wider. The slats for the bottom shelf had to span a significantly wider distance so I added an extra support in the middle. In addition, the size of most of the boards was scaled up – 3×3 legs instead of 2×2, 1×3 struts instead of 1×2, and 3″ wide slats instead of 2″ ones. I used the miter saw that I had purchased near the end of constructing the entry table frame for every single cut in the coffee table frame. This did a great job of countering some of the minor inconsistencies and not-quite-90° ends on the cuts. It really made me realize that basically every cut that I’ve ever made freehand wasn’t really that accurate. Similarly, while I was able to achieve a good level of consistency when measuring the lengths by hand, using stop blocks to ensure that all of the boards were the same size was a level above.
During assembly, I cut some spacers to help clamp the boards in place before driving in the pocket hole screws. Those held the boards more firmly and kept the boards from shifting when the screws were driven in resulting in more accurately centered joints.
Coffee Table Top
This again followed pretty much the same process as the entry table’s top. The easiest and most impactful improvement here was simply to take more time at the store and to be pickier when selecting lumber. The straighter the boards are to start with, the less effort you need to expend to compensate for problems. Secondly, while the cauls did a good job of flattening the panel on both ends, some small vertical misalignments may remain in the middle. It is much easier to fix those inconsistencies by pressing them flat before tightening the clamps as opposed to trying to sand them out afterwards.
I also made a couple of changes when using the circular saw to trim the ends flush. First, I switched from the framing lumber blade that came with the saw to a finer 60-tooth crosscut blade. Second I built myself a DIY track saw to keep the saw straight instead of just trying to hold it steady against an improvised fence.
I also picked up a larger and higher quality brush which helped a lot when applying the stain and polyurethane to the large surface. I still missed a few small glue spots before staining, but smaller than before, and again only on one side which I then used as the bottom. Final assembly went about the same except I opted to use larger angle brackets as I felt that the ones on the entry table weren’t quite as strong as I would have liked.