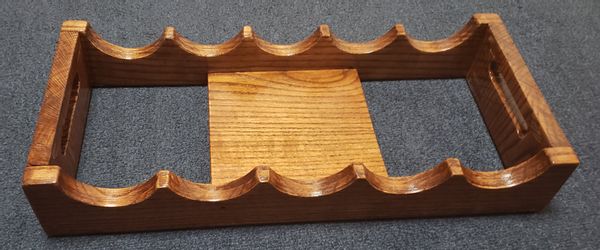
Wine Rack
This was the first of my quarantine projects, and I wanted something relatively simple to get into woodworking. It had been several years since I built anything, and hadn’t ever really worked with hardwoods. I was already planning some living room furniture but wanted a small project to start off with.
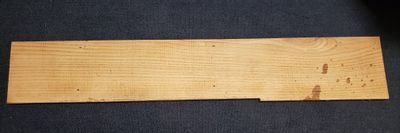
I have a few wine bottles but didn’t have any dedicated storage for them. I didn’t need a particularly high capacity rack and was planning to store it on a small shelf within a cupboard. I also had an irregular piece of leftover hardwood to use for the project. The width of the shelf that I intended to put the rack on and the dimensions of the board provided some initial size constraints for the project. Off I went off to search the Internet for inspiration. After trying a few designs I settled on something relatively simple and got to work.
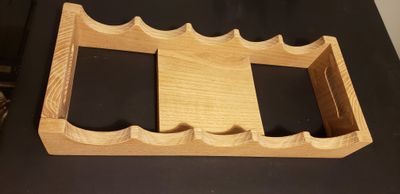
Before finalizing the dimensions, I wanted to make sure it would be versatile enough to fit future bottles. It turns out there are a huge range of wine bottle sizes. Even if you ignore everything but the “standard” 750ml bottles, there’s a fair amount of variety in the diameter, shape, and height. I picked a 3 1⁄2″ hole size that would be large enough to accommodate almost every standard-sized wine bottle with a bit to spare. That size also conveniently fit into my target width exactly 5 times after accounting for padding.
After purchasing a hole saw for the project that was, frankly, a bit large for my cordless drill, I marked out the centers and got to cutting. Once the holes were drilled along the center of the board, I ripped it in half to get my front and back pieces. The width of the board was good size to give the finished project a depth that comfortably held the bottles. I cut two ends to match the height of the front and back and used the remainder for a base. I was looking for an excuse to use the pocket hole jig I had purchased for use on my upcoming projects so I decided to try it out. I drilled two holes on each side of both of the ends as well as the base to join them to the front and back.
Lastly, I wanted to add handles on the sides to make it easier to lift. After making some test cuts on an offcut piece I decided that I liked the ergonomics of a 3⁄4″ high opening that was about 3 1⁄2″ wide. I cut the handles by drilling out both ends with a spade bit and then cutting away the material in between. I ended up spacing the holes such that the handles were wider than I intended due to some sloppy mental math and hasty drilling. Turns out there’s a good reason for that “Measure twice, cut once” proverb, but the consequences weren’t too significant. I had a jigsaw attachment for my Dremel that I thought would make quick work of cutting away the wood between the handles. However, the stability wasn’t fantastic, I didn’t have clear visibility of where the blade was cutting, and it struggled a bit with 3⁄4″ hardwood. Not entirely satisfied with the straightness of the cut, I switched to a coping saw for the remaining edges which was better but also not perfect. A bit of time with a file and some sandpaper allowed me to clean up the edges and overall they came out… okay.

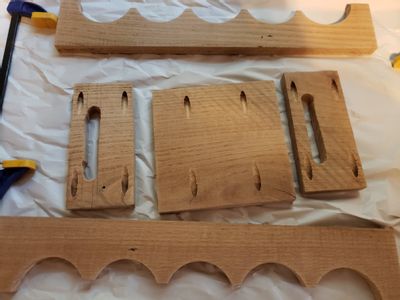
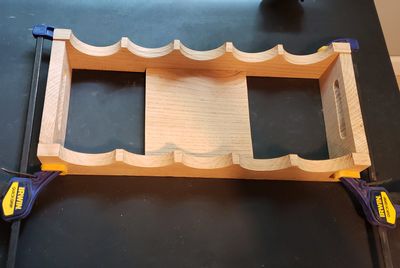
I now had all of the pieces cut and was ready to assemble, but a quick test-fit revealed that not everything was perfectly aligned. Most of the boards had been cut freehand so there was a bit of variation and some not-quite-90° angles. I evened those inconsistencies as best as I could with a sanding block and got it to where I was relatively satisfied.
When screwing it together, I mistakenly selected softwood pocket hole screws instead of hardwood ones. They took a lot of force to drive in, and in doing so I accidentally torqued the head off of one, but they otherwise worked fine. I probably could have added some wood glue in addition to the screws during assembly, but it felt very solid as is. I then filled in the pockets with some pre-made plugs, cut them flush and proceeded to sand the whole thing. Sanding the inner curved surfaces turned out to be something of a hassle and I ended up just using a loose piece of sanding paper by hand. In hindsight I could probably have made impromptu sanding blocks out of the hole saw cutouts that would match the curvature.
After assembly and sanding, all that remained was to apply the finish. I started off with a coat of Minwax english chestnut penetrating stain. I didn’t wipe the excess stain off quite as completely as I should have which left the surface tacky. Thankfully a 2nd application “reset” things and it dried nicely that time. Once that was set, I gave it two coats of polyurethane, stuck some adhesive felt feet on the bottom, and was done.